As an Amazon Associate we earn from qualifying purchases.
Table of Contents
How to use split shot to catch more fish when fly fishing
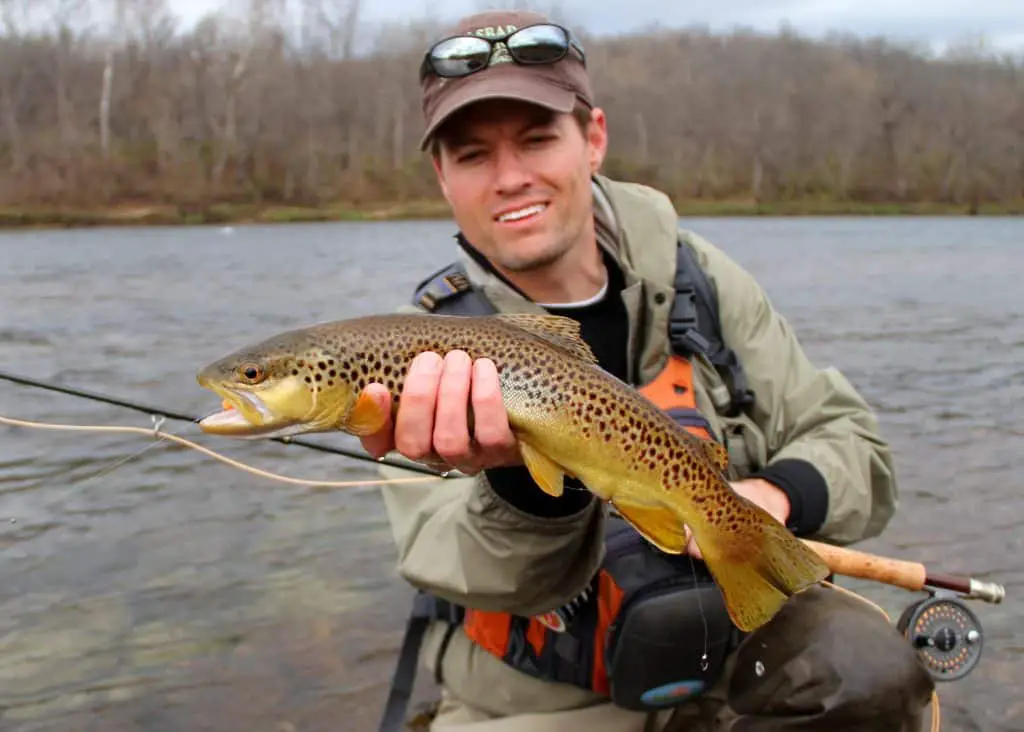
Fly fishing began with the exclusive use of flies on the surface of the water. Later to become known as dry fly fishing, this method results in exciting, visual takes. Everyone who has ever caught a fish on a dry fly had a smile on their face for the rest of the day. Little did people know they would catch more fish fly fishing with split shot.
Later on, people began using below the surface flies and referred to them as “wet flies.” Even later on, this category came to include the also exhilarating method of streamer fishing. Streamer fishing is an active method of imitating large insects, fish, and crustaceans. Since fish that feed on these types of food tend to be bigger and more aggressive than typical fish, streamer fishing can be as exhilarating as dry fly fishing.
However, there is another type of wet fly fishing known as nymphing. Nymphing uses sub-surface flies to imitate very small aquatic insects.
It is an unfortunate reality that dry-fly fishing and streamer fishing is not always the most effective method to catch fish. Sometimes even the dry-fly-or-die guys have to pick up their nymph rigs, and the same is true for the meat slingers and streamer junkies. There’s no way around it: nymphing catches fish.
One could even say that nymphing is a more consistent method of catching fish, but you’ll never hear me admit that.
No matter your preferred method, you can learn to catch more fish by utilizing nymph fishing , and if you already do nymph, you can catch even more fish if you learn how to use split shot.
Why fish with split shot
When fly fishing with wet flies, the fish typically will only take flies that are in the “strike zone.” The strike zone is the area in the water column that the fish are keyed-in on during that particular moment. The zone is determined by a myriad of factors including the type of food the fish is eating, the weather, the water clarity, and ten thousand other things that fishermen only pretend to know about.
For example, when I was fishing the Provo River in Utah during the early spring, the fish tended to be right above the bottom. If my flies were above that depth, they probably wouldn’t take them. If my flies were below that depth, they definitely wouldn’t.
Trout feed looking ahead and looking up. They rarely swim down for food.
The advantage of using split-shot is that because the split-shot adds weight to your rig your fly will sink into the strike zone faster. Because it gets there faster it will spend more time there during your drift, catching you more fish.
Sounds simple enough.
But should you just slap some lead on your line and throw it out there? Of course not.
To most efficiently utilize the benefits of using split shot while fly fishing, you need to know what to do with them. And as typical for any topic involving fly-fishing and fly fishermen, the most effective methods are denied and debated.
You be the judge though. Here are a couple ways to use split shot to catch more fish fly-fishing.
Provo River Bounce Rig
As I mentioned earlier, I fished using split shot on the Provo River outside of Salt Lake City. In fact, that was the river where I learned my favorite method of using split-shot to catch more fish while I was nymphing.
On the Provo, the most effective and common method of nymphing uses split shot to weigh the end of the nymph rig down. Here’s a step-by-step guide on how to tie it:
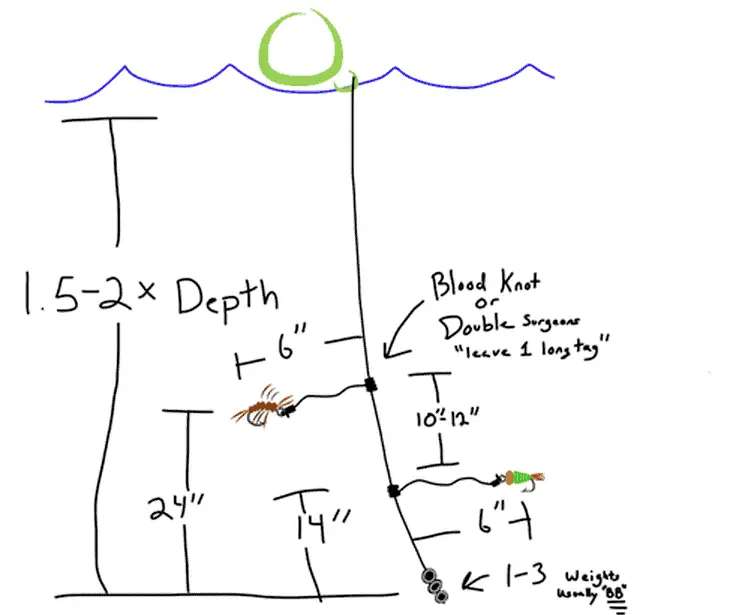
- Determine the depth of the water you’re fishing, and take note of the current speed.
- Multiply the depth of the water by 1.5 (if the water is 4 feet deep, you want 6 feet of depth). That is the length of leader and tippet you want below your indicator. The part of the leader below the indicator should be tapered.
- Take an appropriate length of tippet and tie it to your leader using a blood knot. On the tag end, tie your fly.
- Take another, shorter length of tippet and tie it to the free end of tippet that is already tied to your leader again using a blood knot. The length of this section should be about the length of the biggest fish you expect to catch in that river.
- Tie your second fly to the tag end of this second blood knot. At the free end, attach one split shot.
In reading this, you may have noticed a level of ambiguity.
That is because the length of tippet you must use for each blood knot will depend on the depth of the water and the length of your leader. You pretty much have to just use trial and error until you get a feel for the measurements.
Also, the last step just says to attach one split shot, but it does not say what size. That is because the size of your split shot on a Provo River Bounce Rig will depend on the depth of the water, the speed of the current, and the length of your drift. Again, you will develop a sixth sense to determine the amount of weight to add.
But here’s a tip.
When using the Provo River Bounce Rig, start by adding a small amount of weight. Keep adding equal amounts until your rig starts to bounce off the bottom (now you know where it got it’s name).
If you’ve never used this rig before, you’re going to think your flies are getting bitten every few seconds, as when the weight bounces off the bottom it looks like a bite. But don’t be discouraged, if the fish are feeding on the bottom, that’s exactly where you want your fly to be.
Because the end of your line just has a weight at the end, you won’t be getting hung up that much. If it gets caught on the bottom, a wiggle will usually set it free.
When using this rig, I sometimes opted to use just one fly. That was effective in more shallow water, or when I was fishing in an area with a lot of snags. My favorite thing to do, though, was to use three flies. My mindset? More hooks=more fish.
Below is a picture of a Provo River Rainbow I caught using a Provo River Bounce Rig.
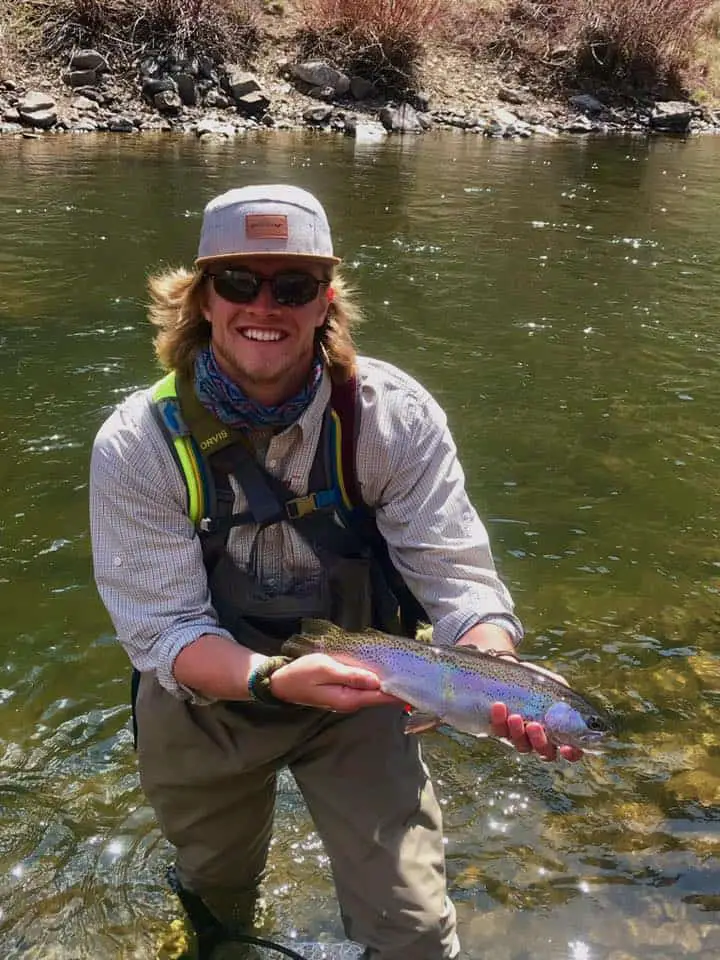
I found the Provo River Bounce Rig to excel in situations with medium to high speed current and over 2 feet of water, when the fish are fishing at or near the bottom. Most of the time I was using it wade fishing, but I’ve also used it while on a drift boat.
In fact, I used the Bounce Rig on a trip to the Henry’s Fork in Idaho with a couple of my buddies from Jackson. We hadn’t caught anything all day until I tied on a Provo River Bounce rig. I caught two 20” brown trout in back-to-back casts.
End Line Rig
Another effective way to use split shot to catch more fish fly-fishing is to use and End Line Rig.
Here’s how to tie it:
- Determine the depth of the water you’re fishing.
- Multiply the depth of the water by 1.5 (if the water is 4 feet deep, you want 6 feet of depth). That is the length of leader and tippet you want below your indicator. The part of the leader below the indicator should be tapered.
- Tie a piece of tippet to your leader using a blood knot and cut away the excess.
- Tie your top fly to the tippet using whatever knot you prefer. I usually tie my heavier fly to this position.
- Attach a length of tippet to the hook of your first fly using a clinch knot. The length of this section should be about the length of the biggest fish you expect to catch in that river.
- Tie your second fly to the free end of your tippet using your preferred knot.
- Add a split shot right above the blood knot that you used to attach the leader to the tippet.
This method is especially useful when fishing from a drift boat and the fish are feeding near the middle of the water column.
Since the boat will be drifting alongside your flies, getting your flies down quickly is not the primary objective of this rig. Instead, you’re using the split shot to keep your flies at a consistent depth.
Determining the depth that the fish are feeding in is the primary difficult in using this rig, and you can’t just send it straight to the bottom. But, since you’re fishing off the bottom, you’ll avoid most snags as long as you’re paying attention.
This rig is extremely effective, don’t get me wrong, but the main reason that I hold it in such high regards is because it is what I was using when I caught the biggest trout of my life.
My dad and I were fishing with one of our guide friends on a river I will not name in Wyoming. We had been tearing the fish up all day long, all while using an End Line Rig, when things slowed down.
After not catching anything for an hour, we began to discuss calling it a day. Right at that moment, I hooked into a massive fish. It ran upstream of us 4 times, each time putting me into my backing. I fell into the water from the boat when in got close enough to shore to land it.

Fly Fishing with Split Shot – Conclusion
There are many other ways to use split-shot to help you catch more fish fly-fishing, and the best way for you to learn them is to try them out yourself. Experiment a little, even, and you may discover a new method. But one of the best ways to hedge your bets is to get your flies down lower, often by using split shot.
If you’re fly fishing anytime soon, try out the Provo River Bounce Rig or the Endline Rig to catch more trout using split shot.
If you catch anything, let us know! We love to hear that we’ve helped assist our readers with catching more fish.
If you found this article to contain helpful information about fly fishing with split shot, make sure to give us a like and share it with your fishing buddies.
Amazon and the Amazon logo are trademarks of Amazon.com, Inc, or its affiliates.